Bleed and safe areas are required when preparing artwork for printing. For labels used in production lines, where they are cut to size after printing, bleed and safe areas are essential to ensure precise trimming and to prevent unwanted white edges from appearing. This acts as a buffer zone, helping to ensure a smooth production process and protecting your design from being compromised when cut to size.
What is Bleed?
Also referred to as; Bleeds, Printing Margin, Bleed Zone.
Bleed is the portion of your artwork that extends beyond the cut line. By extending or ‘bleeding’ the design past the cut line, you create a safety margin that accounts for small shifts during the cutting process, providing clean and accurate edges. This guarantees that even if the material moves slightly, the design will still cover the entire label without leaving unwanted white edges. Bleed can be applied to colours, patterns, and images, helping your labels maintain a professional, polished look with no visible gaps or borders. We require 3mm of bleed to allow for any movement during production.
What is a Safe area?
Also referred to as; Safety zone, Safe Margin, Buffer Zone..
The safe area is the portion of your artwork inside the cut line where important elements, such as text, logos, and key design features, should be placed. By keeping these neat within the safe area, you ensure they will not be cut off during the trimming process. This space acts as a buffer zone, preventing essential content from being too close to the edge, where it could be lost if the material shifts slightly. We require a 3mm safe area for all important elements to ensure that any misalignment during cutting does not affect the final design.
Design Tip: Why Proper Bleed Is Essential for Complex Artwork
Based on our years of experience in design, we have found that adding bleed after finalising your artwork isn't just an extra step, it's an important process to avoid visible seams, distortions, or awkward extensions in print. When elements such as gradients, drop shadows, or fine details extend to the very edge of a label, a simple ‘auto-bleed' can lead to stretched flames, oversized shadows, or misaligned textures, issues that instantly lower the perceived quality of your finished product.
Key Insight:
- Manual Intervention: For complex artwork, a quick mirror or stretch of the edges can create obvious inconsistencies. Instead, precise, manual cloning and redrawing preserve the original style, ensuring the bleed area looks seamless.
- Common Problems: We often see last-minute bleed additions resulting in unnatural-looking shadows or flames "drifting" outside the intended design.
- Practical Advice: Plan for bleed and safe areas from the start, typically 3 mm on each edge for most print jobs. If last-minute changes are unavoidable, our team uses careful, hands-on techniques to clone and blend adjacent colours, preventing quality loss.
Ultimately, paying close attention to bleed and safe-zone guidelines from the outset helps avoid time-consuming fixes later. But if you do need to add bleed on short notice, trust our years of hands-on expertise, we'll treat your artwork with the level of care necessary to ensure a flawless final product.
Setting up Bleed and Safe Area in Adobe Illustrator
Adobe Illustrator is a popular, vector-based graphic design software, with features and functions designed specifically for print. It is a very useful tool for creating and modifying designs for label printing. Setting your document up is the first step, and there are multiple ways to effectively add bleed and apply a 3mm safe area.
Document Setup
Open Adobe Illustrator and start a new document by navigating to
File > New. In the height and width box, input your label dimensions: this is the size of your label when it is cut.
Underneath, in the 'Bleed' section, add
3mm into the top, bottom, left and right boxes, and press 'OK'. This will open your document with your artboard or canvas at the cut size and display a red line at the boundary your bleed should extend to.
If you already have an artwork open in Illustrator and simply need to add the bleed box, navigate to
File > Document Setup and apply 3mm to the bleed boxes in this window.
Safe Area Setup
Illustrator does not have automatic guides available, but it is easy to create a margin from scratch. With your new or existing artwork open, create a shape that matches your artwork’s shape (square, circle, rectangle, or oval). Reduce its width and height by
6mm to ensure a 3mm gap on all sides; top, left, right, and bottom. Right-click this new shape and select ‘Make Guides’ to create a reference line that marks your 3mm safe area boundary. Make sure the guide is centrally aligned both horizontally and vertically within your artwork.
Keeping all your key text, images, and logos inside this boundary ensures they are protected during the trimming stage of production. This document can now be used as a tool for both creating new artworks and importing existing designs to check bleed and safe area measurements, allowing you to make any necessary adjustments.
Design Tip: Leverage Non-Printable Guides in Illustrator
Based on our in-depth experience working with complex artwork, we recommend using Illustrator's guides to establish safe areas, margins, or cut lines, without worrying about them appearing in your final print. Because they're “non-printable”, you can freely adjust your layout or tweak key design elements right up to the edge, ensuring that nothing important is trimmed away during production. By setting up these guides from the outset, you'll save yourself time and reduce the risk of mistakes later on.
Sales Tip: Bleed and Safe Area Templates to Simplify Your Artwork Setup
If you're not very technical with Illustrator or just want a straightforward solution, we have bleed and safe-area templates ready to send upon request. These preset PDF files remove any guesswork about sizing, margins, or trim lines, so you can quickly drop in your design and be confident it's set up correctly. Simply reach out to our team, and we'll provide the templates you need, giving you peace of mind that your finished labels or prints will meet professional standards without any stressful last-minute fixes.
Fill Bleed
Suitable for; One colour vector background, artworks with one colour raster backgrounds.
One of the simplest methods of filling your bleed area for artworks with a one-colour background (both vector and raster images) is to create a shape that matches your artwork at the same size as the bleed boundary you set previously. Colour pick your artwork's background colour using the eyedropper tool or copy the CMYK values from the artwork and apply them to the Fill colour of your new shape. If your artwork is flattened or an image, we recommend rasterising your image to match the new background size.
Extending Bleed
Suitable for; Vector artworks, borders and banners, editable elements.
Another easy way to add bleed is by extending the shape of elements that touch the edge of the canvas up to the bleed line. By manoeuvring the anchor points past the canvas and up to the red bleed line, you ensure there is a 3mm extension of your artwork on all sides. If you have an element like a banner or curved shape that touches the cut edge, make sure to extend it in the natural direction it is travelling rather than straight out to the side. This keeps the shape consistent and prevents distortion, even in the event of slight misalignment during cutting.
Design Tip: Extend Your Bleed Where the Artwork Naturally Flows
From our experience, extending your bleed in the same direction as your artwork's natural lines helps prevent visible steps or misalignments at the label's edge. Even a small production offset can create a sharp, unintended “jump” in the design if the edge of a shape cuts off abruptly. For instance, if you have a semi-circle placed right against the cut line, allow the circular curve to continue within the bleed area. This ensures a clean, uninterrupted finish, even if there's a tiny shift during production.
Reflected Bleed
Suitable for; Complex bleed, images and patterns.
If your design has a more complex element at the edge, adding bleed manually can be time-consuming and difficult, especially if the element is a pattern or a flat image. A simple solution is to duplicate the item and reflect it either horizontally or vertically by selecting Right-click > Transform > Reflect. Align the duplicated image or pattern edge to edge so that it extends beyond the cut line. This ensures that any misalignment during trimming will reveal a seamless continuation of the existing area, making it far less noticeable than a white gap.
Scaled Bleed
Suitable for; All elements with no specific key portion.
Simply increasing the size of elements at the cut edge of your label and overlapping them into the bleed zone can be an effective way to add bleed. The only drawback is that you may sacrifice some details at the edge of the artwork. If this is an image, you could lose a portion you intended to display. This technique needs thought on what is important in the design. Use the Move and Scale tools in Illustrator to adjust and position your artwork accordingly, ensuring key elements remain intact while extending into the bleed area.
Design Tip: Watch Your DPI When Scaling Images
From our hands-on experience with high-resolution prints, remember that scaling up an image in Illustrator reduces its effective DPI. While scaling your bleed can be a quick workaround, manually increasing the PPI doesn't genuinely boost image quality, it merely interpolates (or “fakes”) extra pixels. After adjusting your artwork's size, always double-check the DPI of each embedded image by selecting it and looking at the information panel in the top-left corner of Illustrator. If the resolution falls too low, you may see pixelation or loss of detail in the final print. For truly crisp results, start with the highest-resolution images possible rather than relying on post-scaling fixes.
Setting up Bleed and Safe Area in Adobe Photoshop
Adobe Photoshop is an image editing software used for creating, editing, and manipulating raster-based images or pixel-based graphics. It is widely recognised as the industry standard for photo editing and digital imaging but can just as easily be used for label design and editing with some extra considerations.
Document Setup
Starting with the size of your label, create a new document
6mm larger than the size required. This creates a canvas with the bleed included, and we will use some clever guide placement to highlight the cut and safe area boundaries. One extra thing to consider is the starting resolution of your document. For new artwork, 600 pixels per inch is a good place to start. For existing artworks, try to match the document resolution to the resolution of your artwork. This ensures any bleed you add is the same quality.
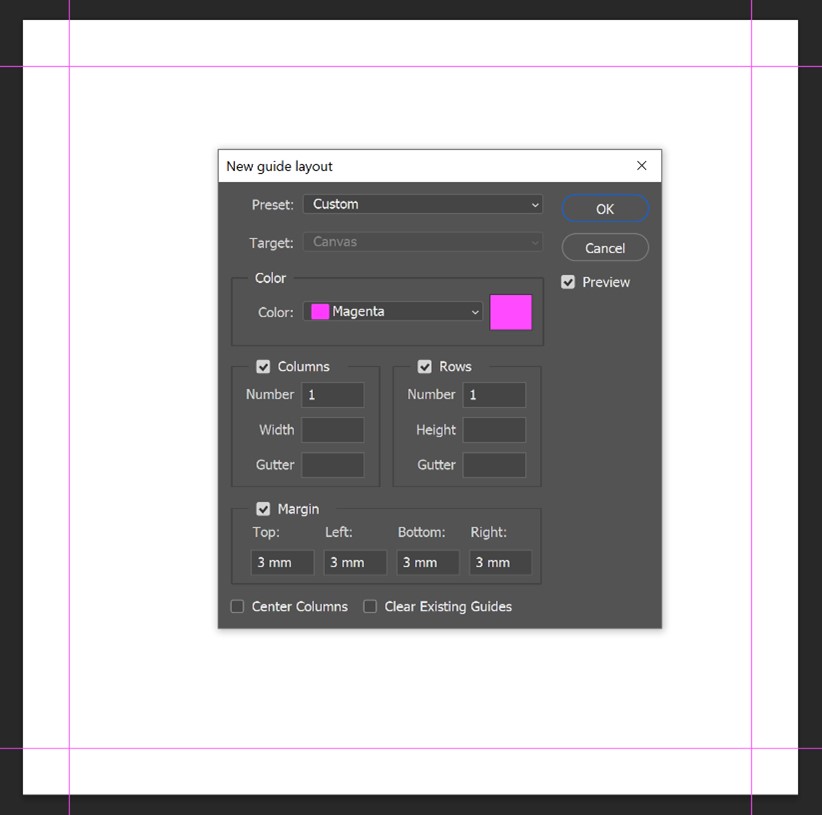
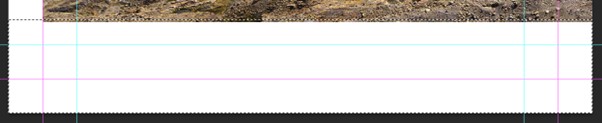
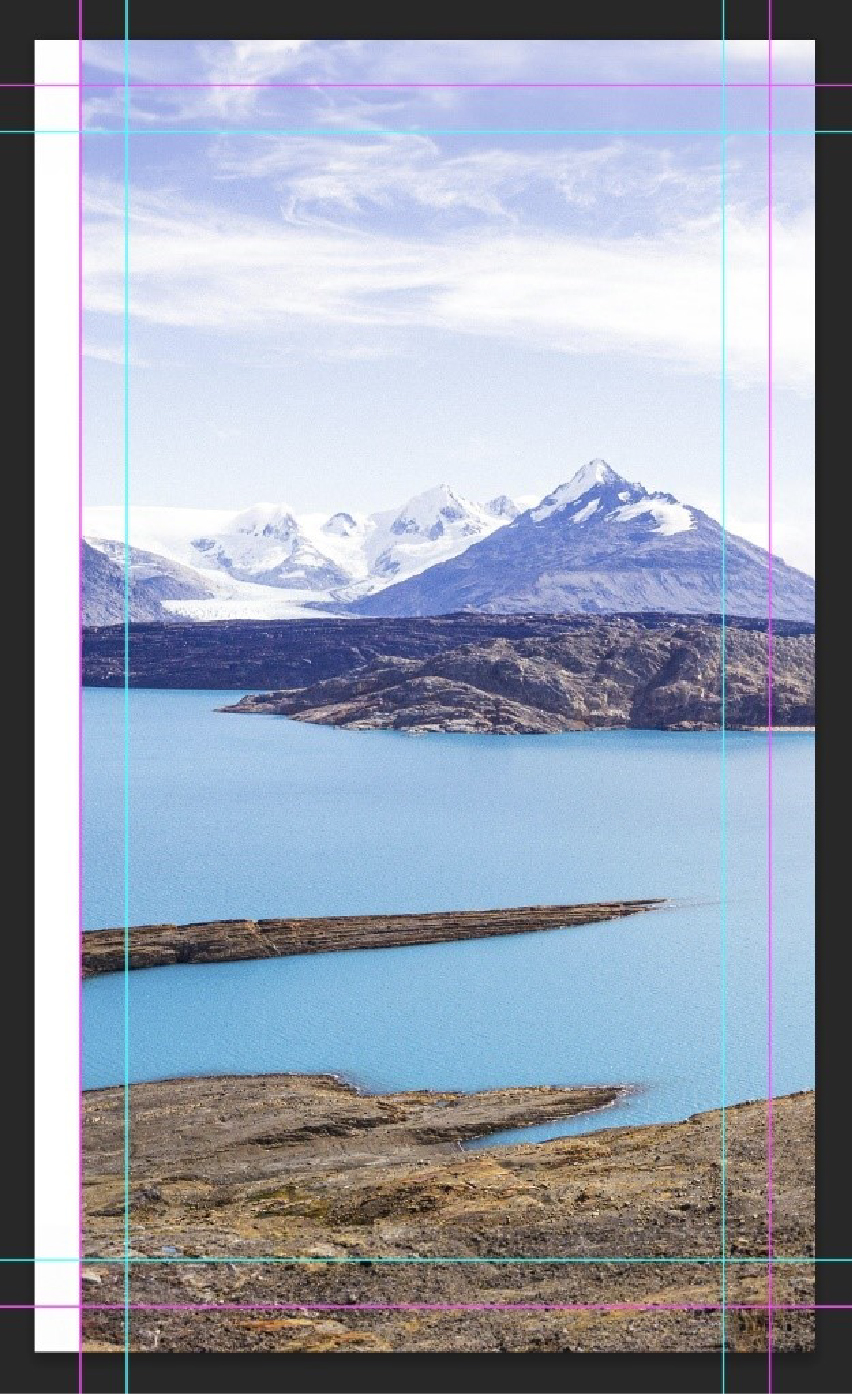
To add your cutline reference, go to
View > Guides > New Guide Layout. Enable the columns and rows by ticking the relevant boxes and set the 'Number' of both to 1, leaving the height and gutter options blank. Secondly, enable the ‘Margin' option and set Top, Left, Bottom, and Right values to '3mm'. We find it helpful to set the cut colour to magenta, as it stands out against most artworks.
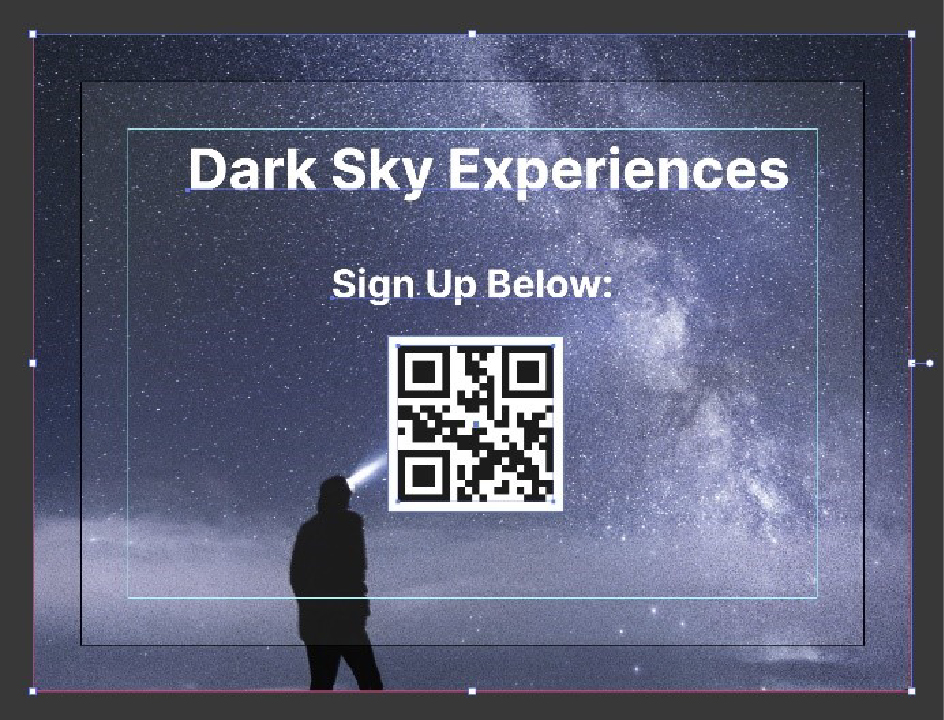
Your document is now set up so that the edge of the canvas is your bleed boundary, and you have a magenta guide showing your cutline.
Safe Area Setup
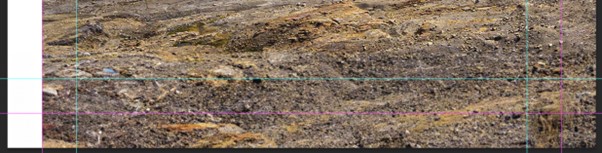
Similar to Illustrator, Photoshop does not have any one specific tool to apply a safe area, so we will reuse the function we used to create the cutline. Navigate to
View > Guides > New Guide Layout again. Enable the columns and rows sections by ticking the boxes and set the 'Number' of both to 1, leaving height and gutter options blank. Then enable the 'Margin' option and set Top, Left, Bottom, and Right values to 6mm. We find it helpful to set the cut colour to cyan, as it stands out against most artworks and helps differentiate it from the cut reference you created.
Now you have guides that will help you move, scale, and orient your key design elements so everything important is protected. You can now focus on adding the correct bleed for your design.
Design Tip: Opt for 300–600 DPI to Maintain Print Quality
From our extensive experience in professional printing, we've learned that setting your document resolution between 300–600 DPI in Photoshop provides a reliable foundation for crisp, high-quality prints. Many software tools (especially when flattening files) can alter or misinterpret DPI settings, causing your artwork to end up with a lower effective resolution. By defaulting to a higher DPI, you're protecting yourself against these adjustments allowing the details to remain sharp.
Why Higher DPI Is Better:
- Consistency Across Software: Even if one tool flattens or resamples your file, starting with a higher DPI preserves more of the original quality.
- Resilience to Editing: Artwork gets passed around between designers, clients, and different applications, some of which may reduce resolution automatically.
- Visual Check: Numbers alone don't tell the whole story; trust your eye as well. Viewing your design at 100% on a decent monitor provides a true-to-size perspective on how the image will appear in print.
By planning for a 300–600 DPI range from the start and keeping a close look on how your designs display at 100% zoom, you'll greatly reduce the risk of unexpected pixelation or blurring when the final product rolls off the press.
Fill Bleed
Suitable for; One colour backgrounds, artworks with one colour raster backgrounds.
In Illustrator, adding a single-colour extension to your design is a quick way to ensure your design fills the label once cut. Simply pick the background colour of your artwork with the eyedropper tool and either use the Paint Bucket tool to flood the canvas with colour or paint it in using the various brush tools. For artworks with two or more tones in the background, some careful selection or masking may be required first.
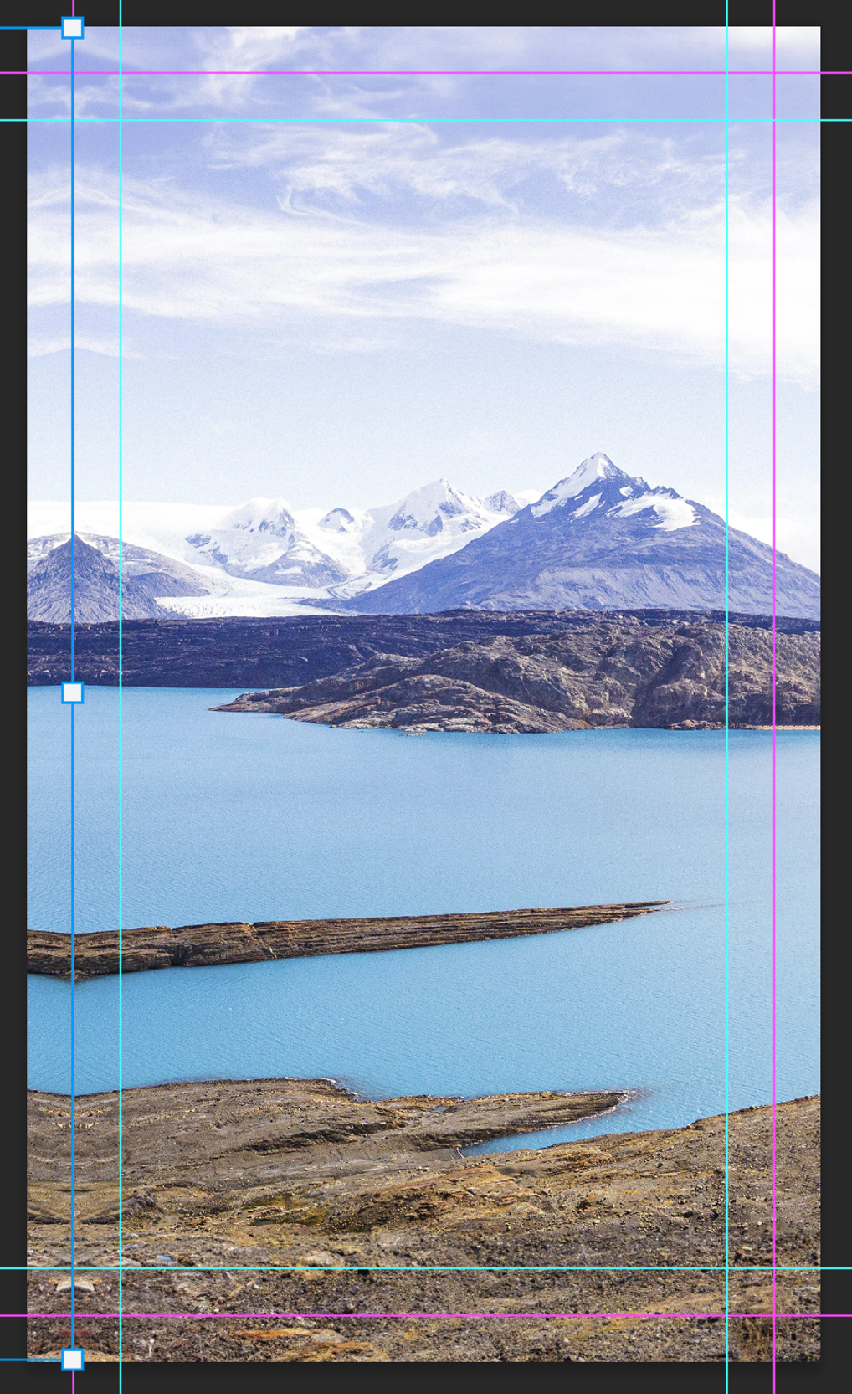
Extending Bleed
Suitable for; Images, simple patterns, banners, or borders.
Photoshop has powerful tools that can be used to extend your bleed. By selecting the bleed zone and a very small portion of your artwork, you can use either 'Content Aware Fill' or, in newer releases of Photoshop, the AI-driven 'Generative Fill'. Both can extend your design up to the canvas edge and ensure that the 3mm bleed is in place.
Content Aware Fill:
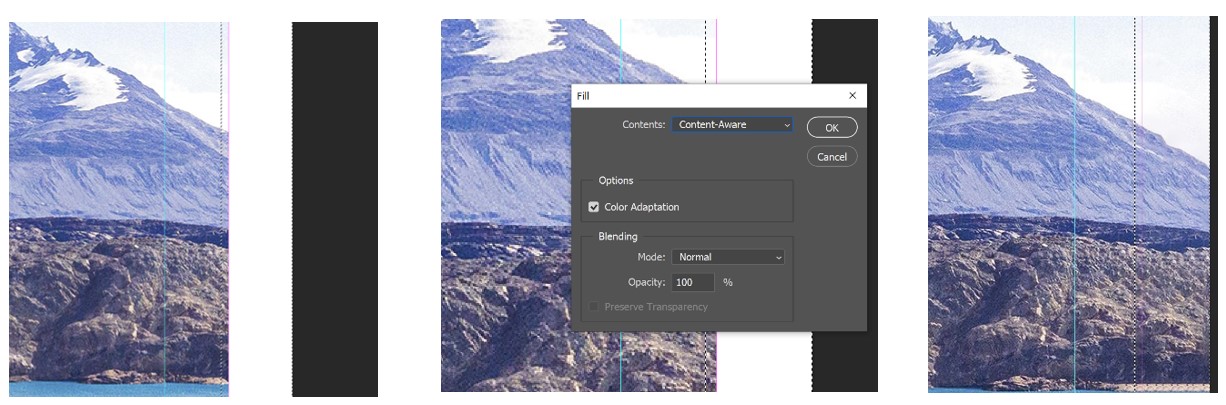
Content Aware Fill's main purpose is to remove unwanted objects from an image and replace them with pixels from the surrounding area. We can use this tool to select any blank space plus a small selection of the edge of the artwork to extend the design based on nearby pixels.
Select the gap between the edge of the canvas and slightly overlap your selection with the edge of the artwork. Then go to
Edit > Fill and change 'Contents:' to 'Content Aware Fill'. Enable 'Colour adaptation' and leave the blending settings as they are. Once you confirm, Photoshop attempts to extend your design automatically.
Content Aware Fill is not perfect, and can struggle with more complex images or patterns, but it is quick and easy for simpler designs.
Generative Fill:
Released in version 25.0, 'Generative Fill' is an AI-powered feature in Photoshop that can be very powerful for adding bleed, particularly if your artwork contains complex images, patterns, or unusual shapes and varying tones.
Similar to Content Aware Fill, you will need to select the blank space up to the bleed boundary, overlapping slightly into the existing design. Go to
Edit . Generative Fill and proceed without typing a prompt. Photoshop will fill the space based on your artwork. This action generates a layer with three options to choose from. Select the most successful or regenerate until you are happy.
Generative Fill can take longer than Content Aware Fill but may produce a better result for more complex bleed requirements.
Design Tip: Extending Artwork with Generative Fill
From our hands-on experience, Generative Fill can be an excellent way to extend artwork, especially images beyond the cut line. However, you might not always get the full extension you need on the first pass. In those cases, we often:
- Use Generative Fill to push the artwork out past the cut line.
- Reflect any further sections required to cover the 3 mm bleed zone, ensuring a seamless look without odd breaks, or stretching.
This two-step approach retains the integrity of your original design while giving you the extra space you need for bleed. Just remember to double-check for any AI-generated artefacts, if necessary, refine the filled areas manually to maintain a perfectly cohesive finish.

Reflected Bleed
Suitable for; Complex images or patterns.
As with Illustrator, you can use duplicate, transform, and reflect tools to mirror your artwork at the edges. If your artwork is already at the size you need and does not require additional bleed, this can be a quick and easy approach. Duplicate the layer your artwork is on, reflect it at the left and right edges, merge, then reflect that layer at the top and bottom. This effectively mirrors the design so there is no blank space at the bleed zone.
Design Tip: Reflecting Bleed in Photoshop, Watch Your Snapping Settings
After many years of trial and error, we have found turning off snapping in Photoshop is often essential when you're reflecting artwork to add bleed. While snapping can be a handy feature for general alignment, it can inadvertently shift your layer when you're trying to fine-tune placements near the cut line. Once you've finished adjusting your reflected image, don't forget to hide your guides and thoroughly check for any white seams or hairline gaps before finalising your design. This quick review step ensures your artwork is seamless and ready for a clean, professional finish.
Scaled Bleed
Suitable for; All elements with no specific key portion.
As with Illustrator, if your artwork does not contain specific key areas required on the label, scaling it beyond the cutline up to the bleed area can be one of the quickest methods to fill the bleed zone. This works well for backgrounds that use repeating patterns or gradients, where enlarging the design will not omit crucial details. As long as your safe area is not compromised, it is a straightforward method.
Design Tip: Avoid Oversized Files by Cropping After Scaling
We sometimes receive extremely large files from customers who are surprised their simple designs take up so much space. More often than not, this is because images remain uncropped after being scaled up for bleed, leaving unnecessary data outside the bleed zone. By cropping your artwork down to the exact canvas size, you'll remove excess information, drastically reduce file size, and make it easier to upload to our proofing tool. This small step keeps your project efficient and ensures a stress-free workflow from design to final print.
Setting up Bleed and Safe Area in Canva
Canva is a user-friendly online design platform that allows people to create a wide range of visual content. It can be used effectively for label designing and editing. It is designed to be simple and easy to use for both newbies and professionals, offering a drag-and-drop UI that simplifies the design and editing process.
Document Setup
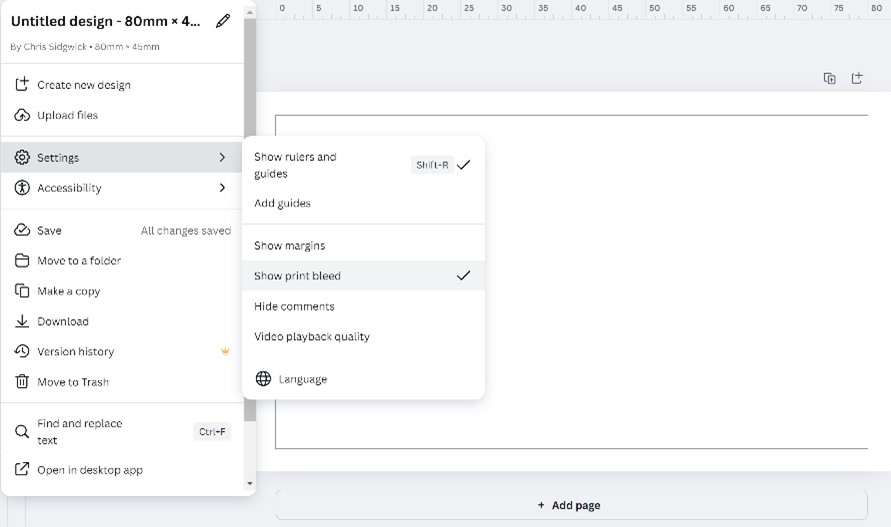
Start by clicking the
+ Create a Design button on the home page. From the options presented, choose ‘Custom size' and input your label's height and width, changing the units accordingly. Then go to File > Settings > Show Print Bleed. This will add a 3mm bleed zone to your canvas and help you see where your design needs to extend.
Design Tip: Build Your Own Canva Templates for Repeated Designs
If you're creating labels for a range of products or you already know the set sizes you'll need, consider building custom templates in Canva. By pre-setting your bleed and safe-area margins, each new design will start with the correct dimensions. We do this on our software ourselves for our most common label sizes, which saves time, avoids layout mistakes, and streamlines every subsequent project. Instead of manually adjusting each file, you can simply open the template and begin designing straight away.
Safe Area Setup
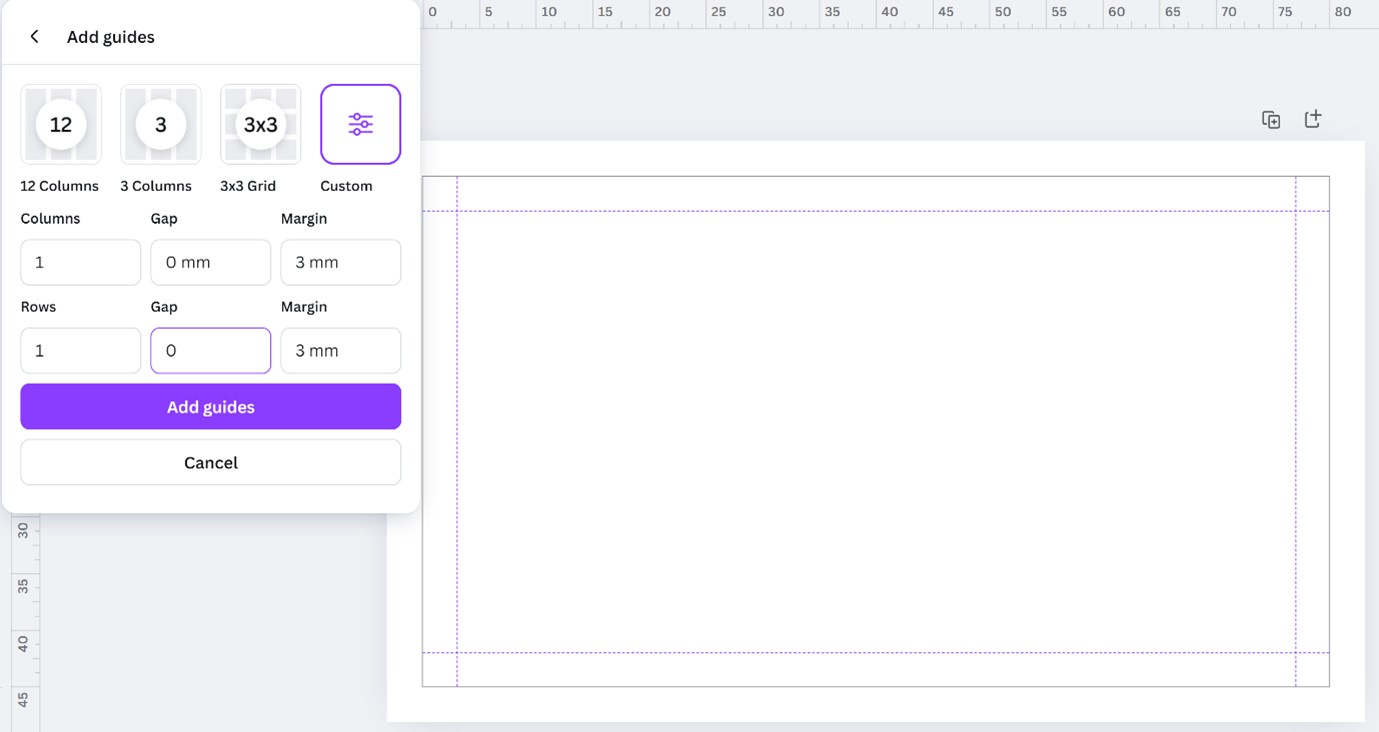
Canva does have an automatic margins option, but it typically creates a safe area larger than 3mm. Instead, use Canva's 'Add guides' feature so we can tailor the safe area to our 3mm requirement. Go to
File > Settings > Add Guides.
In the window that opens, choose the custom columns option. Add '1' for both Columns and Rows, set the Gap on both to '0mm', then add '3mm' to the margins. This creates a 3mm safe area guide on all sides of your document for accurate design placement.
Design Tip: Mind Your Colour Settings When Designing Labels in Canva
In-house, we've noticed a significant uptick in Canva users designing labels, yet the colour picker can be tricky when choosing CMYK colours. Because Canva often defaults to RGB, it's easy to end up with mismatched tones once the file is converted for print. If you're concerned about RGB-to-CMYK conversion, let us know and always make sure to use the “PDF (Print)” download option. This format retains higher-quality print data, reducing the risk of colour shifts or duller-than-expected results in the final product.
Fill Bleed
Suitable for; One colour editable background.
In Canva, if the background is editable (vector), you can grab the handles to extend it into the bleed zone. Canva does not have a dedicated colour picker, so if you want to replicate a colour, you can select the existing object, click the three dots in the floating bar above, and choose 'Copy Style'. Then click the new shape you have added. This only works for editable items. It does not help if your artwork is a flat image.
Extending Bleed
Suitable for; Editable elements such as banners and borders.
Canva's drag handles make it straightforward to extend editable shapes and elements to the bleed border. However, Canva does not offer advanced image manipulation like Photoshop, so this method is limited to shapes and objects you can directly resize or stretch.
Reflected Bleed
Suitable for; Images and patterns.
Reflecting bleed in Canva can be very simple. If you have a shape or image at the cut boundary, right-click and choose 'Duplicate', align it side by side with the original, and then use the 'Flip' button in the floating toolbar. You can flip horizontally or vertically. This method works well for patterns or designs where a mirrored edge will not look out of place. You can then group and repeat if you need more than one edge reflected.
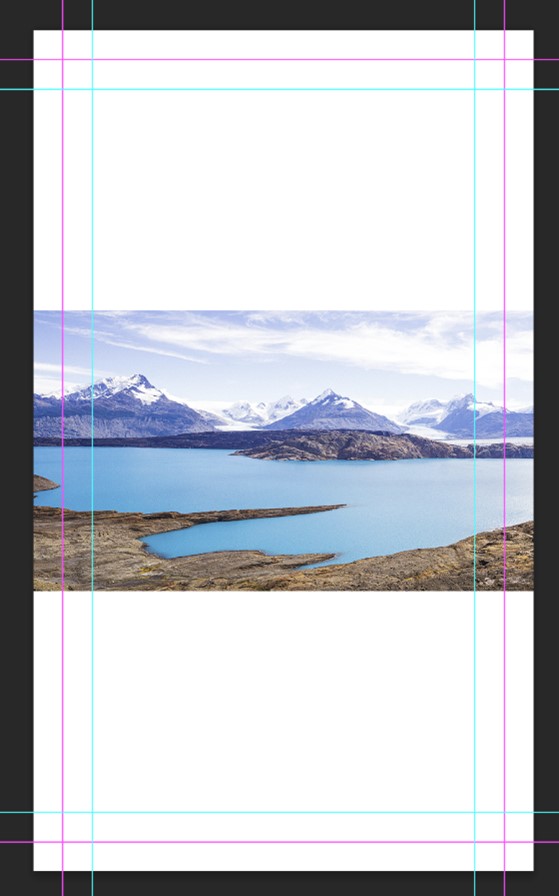
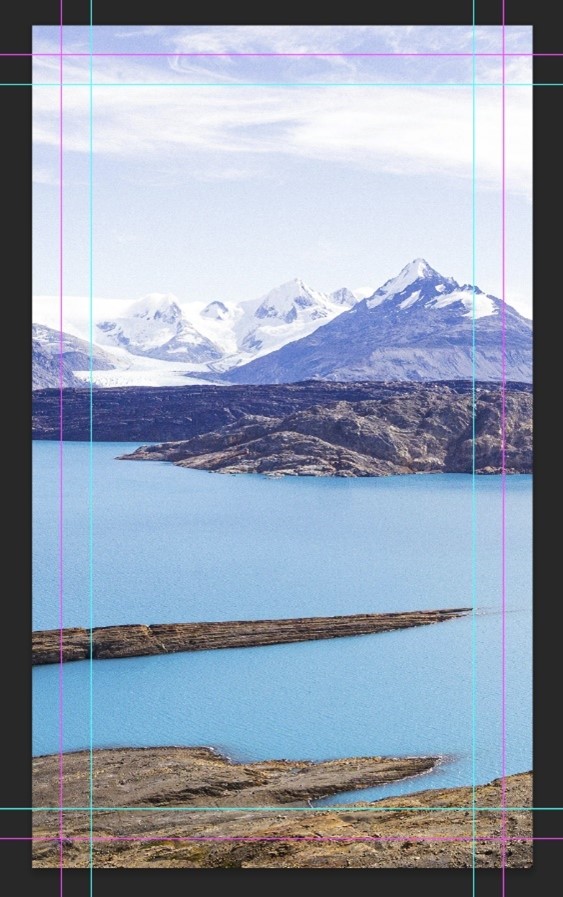
Scaled Bleed
Suitable for; All elements with no specific key portion.
As with other platforms, if your design does not have crucial elements around the edges, you can simply scale the artwork beyond the cut boundary to cover the 3mm bleed zone. This is effective for repetitive backgrounds, gradients, or any design elements that will not look awkward when enlarged. If your artwork is a flat image, scaling or reflecting the bleed will likely be your main options in Canva.
Design Tip: Plan for Bleed and Safe Areas from the Outset in Canva
Drawing on our experience with Canva, we've found that while it offers plenty of flexibility in adding bleed, preparation is everything. If you think about bleed and safe area zones before you begin designing, it naturally feeds into your layout as you work. Doing this will mean your design fits perfectly once it's exported for print, reducing the chance of facing bleed as a last-minute challenge.
Bleed Techniques at a Glance:
|
Bleed Technique
|
Description
|
Suitable For
|
|
Fill Bleed
|
Filling your canvas with the same colour as your background.
|
For artworks with a single colour background.
|
|
Extended Bleed
|
Extending your artwork by manipulating vector objects or using image editing tools like Generative Fill.
|
Straightforward vector artworks or images that continue naturally.
|
|
Reflected Bleed
|
Reflecting your artwork to fill the bleed area.
|
Images that meet the cutline and are too complex for other bleed methods.
|
|
Scaled Bleed
|
Scaling your artwork past the cutline into the bleed zone.
|
Artworks with no key area, where filling the label is the priority. Repeating patterns with no seam.
|